Content:
| Table of Contents | ||
|---|---|---|
|
Collect Karma and Badges!
| Section | ||||||||||||||||||||||||||||||||||||||||||||||||||
|---|---|---|---|---|---|---|---|---|---|---|---|---|---|---|---|---|---|---|---|---|---|---|---|---|---|---|---|---|---|---|---|---|---|---|---|---|---|---|---|---|---|---|---|---|---|---|---|---|---|---|
|


Karma for each user
Each user link in Confluence shows the current karma points of that specific user. Here are some examples:

Updates on the Dashboard

Metadata at a post

Profile cards
The Karma Overview
How to get there?
The Karma Overview provides detailed information about a users karma points. It is reachable via the user profile view or the user dropdown.


Karma history graph, ranking and badges
The left column provides a graph which shows the current karma progress. This graph will be updated once a day. Below the graph the last 20 karma point events will be listed. The top right link on this column leads to a dialog that shows all actions that a user is able to get karma for.
The middle column shows all users which already gained karma sorted descending by their karma points. The currently selected karma user is highlighted in green.
The right column displays the users badges. It shows the already achieved badges and the badges which the user is currently working on. The top right link on this column leads to a dialog with all available badges.

Description
The User Profile Plugin enhances the functionality of Confluence user profiles. The user profiles can be centrally extended with additional elements. On top of that, the plugin supports the synchronization of any attribute from LDAP-based external user directories (e.g. Active Directory, OpenLDAP) and the user profile by extending the LDAP integration functionality of Confluence. So the users are no longer required to update their personal data manually. Each profile element is searchable (additional ones too). User profiles can be displayed via two different macros.
The benefit to you: the data of synchronized user profiles is always kept up-to-date, and can be used to display business cards or to search for contacts.
| Section | |||||||||||||||||||||
|---|---|---|---|---|---|---|---|---|---|---|---|---|---|---|---|---|---|---|---|---|---|
|
Editing the User Profile
The edit modes for user profiles have been extended so that both administrators and users are able to adjust the data for additional profile elements. Elements of profiles for external (LDAP) users that are synchronized are not editable.
Searching the User Profiles
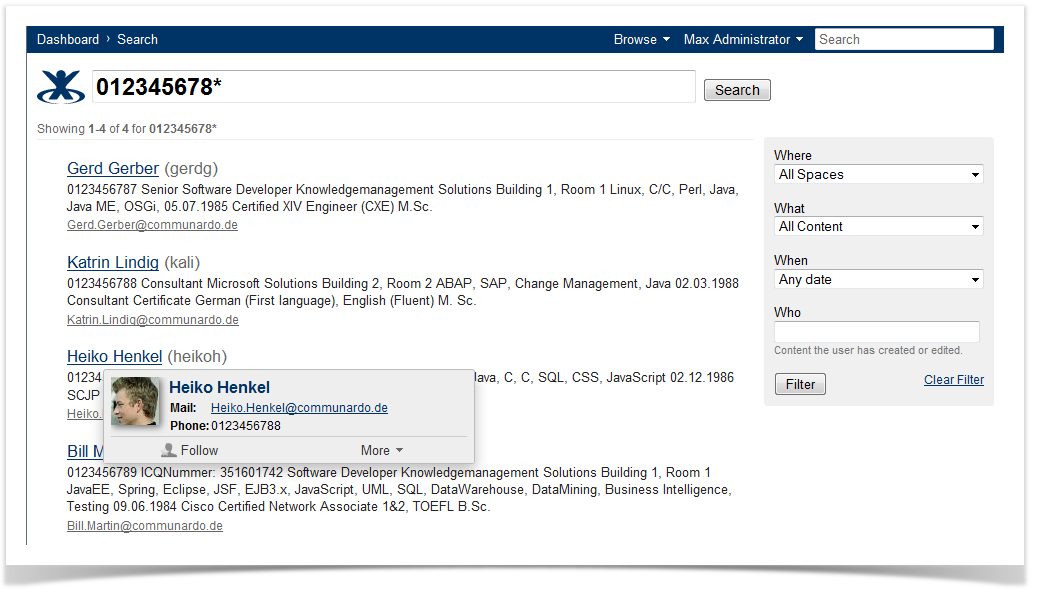
With the User Profile Plugin, the data of all user profile elements is searchable. Thus, users can be found through any information they have provided in their profile. Hits will be displayed as links to the respective user profile in the search result list.
In the following example, a user was found through his phone number:
Extended Search
In addition to making all profile elements searchable, the User Profile Plugin also allows a search for a specific profile element. To do this you have to prepend your search phrase by the Default Title (see above) of the profile element directly, followed by a colon (:). Please be aware that the search is case sensitive with respect to the default title.
The following examples will illustrate how the extended search works:
Let's assume an additional profile element with the name "Hobby" was created. To find all users whose hobby is tennis, the following query has to be used:
Hobby:tennis
Please note that the search term "tennis" directly follows the default title (Hobby), separated by a colon, and that "Hobby" starts with a capital "H".
If you want to search for users having both tennis and soccer as hobby, the query would look like this:
Hobby:(tennis soccer)
If the default title contains a space (or any other character used by Lucene query syntax), this has to be escaped by prepending it with a backslash:
My\ Hobby:tennis
Lucene experts might already have noticed that this is Lucene query syntax. The default title "Hobby" is stored as a Lucene document field and can therefore be used to directly access information for the respective profile element. This is the same for any other profile element. So, there are lots of ways to refine your search ![]()
![]() Demonstration of search functionality:
Demonstration of search functionality:
| Widget Connector | ||
|---|---|---|
|
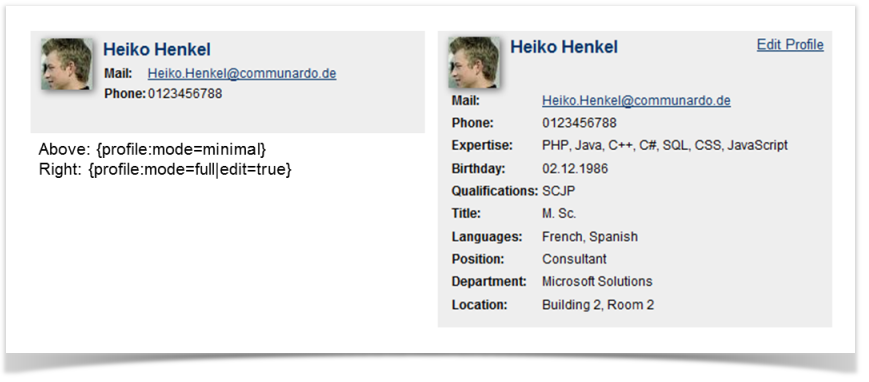
Macro "Enhanced Profile"
Displays the profile information of a user. Different modes allow defining which profile information of a user should be displayed.
Parameters
Parameter | Default | Description |
|---|---|---|
User | none | Required parameter, the username of the user for whom the profile should be displayed |
Mode | full | Optional parameter, the mode defines which elements of the user profile will be shown:
|
| Named fields | none | Fields to be displayed if the mode "namedFields" is chosen. If you want to see multiple fields separate them with commas, e.g. "email" or "phone, website". For the default Confluence profile elements use the following keys:
|
Edit | false | Optional parameter, if "true" an edit link is provided for the owner of the user profile |
![]() Demonstration of profile macro :
Demonstration of profile macro :
| Widget Connector | ||
|---|---|---|
|
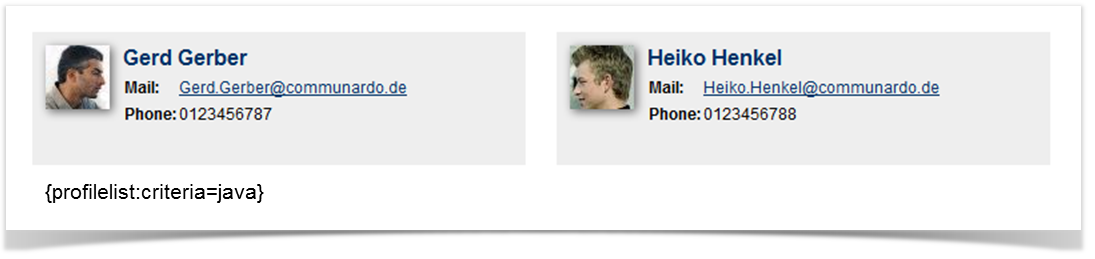
Macro "Profile List"
Displays the profile information of several users according to some given criteria alphabetically sorted.
![]() Demonstration of profilelist macro :
Demonstration of profilelist macro :
| Widget Connector | ||
|---|---|---|
|
Parameters
Parameter | Default | Description |
|---|---|---|
Criteria | none | Required Parameter, the criteria defines which user profiles will be shown. All user profiles that match the specified criteria will be shown. |
Elements per page | 6 | Optional Parameter, defines how many user profiles will be displayed per page |
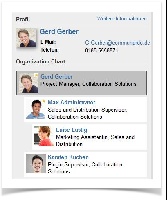
Macro "Org Chart"
Starting from a particular user, the hierarchical relationships with superiors, colleagues and employees are visualized. The organizational charts contain the full name of the person displayed with a link to the profile, the user picture, as well as the department and the position.
Please note:
- The organizational charts are calculated based on the data you entered in our user profile (one field of your profile, e.g. named "supperior" is defined as basis for the hierarchy. All information about superiors, colleagues and employees is automatically calculated based on that field)
- It might take up to 45 minutes until changes to the superior are reflected in the organization chart hierarchy.
Parameters
...
Parameter
...
Default
...
Description
...
User
...
none
...
Required parameter, The user for whom the organization chart shall be displayed.
...
Levels of Parents
(values: 0,1,2)
...
1
...
Select how many levels of parents in the hierarchy (=superior) for the user shall be displayed. If there are less levels of parents for the user available, the extra levels will be ignored.
...
Levels of Children
(values: 0,1,2)
...
1
...
Display Peers
...